

Thread gages are precision tools specifically designed to measure the dimensions and accuracy of threaded components. These instruments serve as a vital element in manufacturing and quality assurance, particularly in industries that rely on threaded parts, such as aerospace, automotive, and construction. Simply put, thread gages ensure that screws, bolts, or threaded holes meet strict specifications and fit precisely, preventing costly errors or product failures. Thread gages come in two primary forms: plug gages for measuring internal threads and ring gages for measuring external threads. Each gage type offers a simple yet reliable means of testing the acceptability of a thread. For intricate analysis, many professionals supplement thread gages with advanced tools, like digital micrometers, or integrate results directly into gage data collection software such as Mitutoyo MeasurLink for streamlined reporting. Proper calibration and inspection practices, like those found in our blog on gage blocks, ensure that thread gages remain accurate and reliable over time.
The importance of thread gages lies in their ability to uphold global and industry-specific standards, including ISO and ASME. Without them, errors in threads could compromise product functionality, create safety risks, or lead to operational inefficiencies.
In manufacturing settings, thread gages complement other precision tools, such as Mitutoyo 500-171-30 calipers, which are ideal for initial inspections of dimensional tolerances. Mastering thread gage usage not only improves product quality but also simplifies communication between departments by providing standardized, quantitative feedback. Integrating thread gages with inspection equipment or leveraging advanced digital solutions ensures seamless, efficient quality assurance processes.
Understanding the Types of Thread Gages: Plug, Ring, and Tapered
Thread gages are indispensable tools in precision measurement and quality inspection, ensuring threads meet required standards and tolerances. There are three primary types of thread gages—plug, ring, and tapered—each designed for specific purposes in inspecting threaded holes, external threads, and tapered fittings. Understanding their functions and characteristics is essential for optimal use in applications such as machining, manufacturing, and metrology.
Plug Gages


Plug gages, often used to check the internal threads of holes, are cylindrical tools with threaded sections that confirm whether a tapped hole conforms to specification. They are available in both GO and NO-GO forms. The GO plug gage assesses whether the internal thread meets minimum tolerances, while the NO-GO plug gage verifies that the thread does not exceed maximum tolerances.
Ring Gages


Ring gages serve as the counterpart for external threads, inspecting bolts, screws, or similar components. Just like plug gages, they feature GO and NO-GO variants. A GO ring gage slides smoothly over properly-sized threads, while the NO-GO ring gage ensures dimensions are within the acceptable range.
Tapered Gages

Tapered thread gages are specialized tools that evaluate threads used in tapered connections, such as those found in pipe fittings or hydraulic assemblies. They feature a gradually narrowing profile to match the changing diameter of tapered threads. Tapered gages are ideal for ensuring proper sealing and alignment in pressure-sensitive applications.
Thread Gage Anatomy: Key Components You Need to Know

Understanding the anatomy of a thread gage is essential for accurate measurements and effective use in a range of applications, including those involving inspection equipment. A thread gage is composed of several critical components, each serving a specific purpose to ensure precision.
-
Go and No-Go Members Thread plug and ring gages often feature "Go" and "No-Go" members. The "Go" side ensures that the internal or external thread fits within the acceptable size, while the "No-Go" side tests for excessive looseness or improper thread quality. These are indispensable for verifying the dimensional requirements specified by manufacturing standards.

-
Handles or Housings High-quality thread gages incorporate ergonomic handles or durable housings for ease of use and prolonged tool life. The design improves stability while detecting key thread parameters, aligning with practices seen in professional setups.
-
Base Material and Coating Thread gages are often constructed of wear-resistant materials like hardened steel or carbide. Coatings, such as chrome or black oxide, are applied to prevent corrosion and extend usability. This contributes to consistent performance, much like gage blocks—critical components in dimensional inspection.
-
Thread Profiles and Pitch The core of every thread gage lies in its precision-cut thread profiles and pitch. These define compatibility with the workpiece.
-
Identification Markings High-end thread gages bear permanent markings for thread size, class of fit, and identification numbers.
Thread gage anatomy mirrors the principles found in other metrology tools, including digital instruments and software solutions aimed at precision. Each component plays an essential role in achieving accurate and reliable measurements.
Preparing Your Workspace: Tools and Safety Measures
Setting up an organized, well-prepared workspace is essential before using a thread gage accurately. Precision tools such as thread gages demand deliberate handling, appropriate environments, and complementary equipment to yield the most accurate results.
Essential Tools and Equipment
To begin, focus on securing high-quality tools that suit the specific requirements of thread measurement and inspection:
-
Thread Gages and Accessories: Ensure the thread gage is clean and free from dirt, burrs, or oil that could distort measurements.
Workspace Organization
Organize the workspace for efficiency and safety. Arrange tools logically to ensure accessibility and to avoid unnecessary motion. Employ durable storage options to house smaller accessories like thread wires or thread plug gages. Utilize anti-static mats or clean surfaces that minimize contamination risks, especially when using finely tuned tools.
Safety Measures
Proper equipment handling minimizes risks. Always wear protective gloves during handling to prevent oil transfer to gages, which can cause corrosion over time. Secure loose clothing and tie back long hair to prevent entanglement with moving parts. Ensure adequate lighting to identify irregularities in threads during inspection. Lastly, keep a fire extinguisher nearby if working in environments involving flammable cleaning agents. Following these measures protects both the operator and the integrity of the equipment.
How to Identify the Correct Thread Gage for Your Needs

Choosing the proper thread gage is essential for ensuring precise measurements and effective inspection processes. Thread gages play a pivotal role in maintaining quality standards, whether for standard threads, specialized applications. Assessing your specific requirements can help avoid costly errors and facilitate seamless integration.
-
Determine the Purpose of Use: Before selecting a thread gage, identify the primary task it will fulfill. Consider whether the gage will be used for internal or external threads, production inspections, or verifying manufactured components.
-
Understand the Type of Threads: Examine the thread type required for the application. For instance, Unified National Thread (UN), Metric Thread (M), or pipe threads such as NPT or BSPT may be specified. Select a gage that matches these standards to ensure accuracy. Referring to articles focused on gage blocks and thread standards can provide helpful insights.
-
Select The Proper Class of Thread: Classes 2A and 2B are the most common thread classes in use, offering a balance of ease of manufacture, cost, and performance. Classes 3A and 3B are best suited where close tolerances, safety, and strength are required, and thus are frequently specified for socket cap and socket set screws.
-
Inspect the Measurement Range: Thread gages come in varying sizes and limits. Verify that the gage measurement range aligns with your application.
-
Confirm Accuracy and Calibration: For professional use, prioritize thread gages with calibration certifications that meet industry standards.
-
Know Material and Environmental Factors: Consider the material of the thread gage and whether it can endure the environmental conditions, such as high heat or moisture. Durable materials ensure a longer service life and more reliable readings. Best practices regarding tool care, as seen with gage blocks, can also apply here.
How to Use a Thread Gage for Internal Threads
Accurately measuring and inspecting internal threads is a crucial process in ensuring the quality and compatibility of threaded components. Using a thread gage correctly requires following specific steps, proper inspection procedures, and understanding related tools. Here’s a detailed guide:
-
Choose the Appropriate Thread Gage Select the correct size and classification of the thread gage that matches the internal thread type you need to inspect. For precision, ensure the thread gage complies with the necessary standards and tolerance levels.

2. Inspect the Thread Gage Before using the gage, check it for wear and tear, such as burrs, dents, or damaged thread profiles. Damaged gages can produce inaccurate results and compromise inspection quality.
3. Clean the Threaded Component and Gage Remove any dirt, debris, or grease from the internal threads and the thread gage itself. Use appropriate cleaning solutions to ensure no material buildup affects measurement precision.
4. Insert the Thread Gage Gently insert the thread gage's "Go" side into the internal thread. Avoid using excessive force to prevent damaging the part or the inspection tool. Check for smooth operation; a properly fitting thread gage should rotate without resistance.
5. Test the "No-Go" Side Flip the gage to use the "No-Go" side. Insert it into the internal thread to confirm it does not engage. If it does, the thread may be out of tolerance.
6. Repeat as Necessary Inspect multiple components, if required, to maintain consistent quality across the batch.
By following these steps, internal threads can be inspected with professional precision, ensuring high standards for thread compatibility and structural integrity.
How to Use a Thread Gage for External Threads
Using a thread gage to inspect external threads requires precision and proper technique. This process ensures thread compatibility by confirming that the threads meet standard specifications.
-
Prepare the Part Begin by cleaning the external threads of the component. Dirt, debris, or oil on the surface may interfere with the accurate reading of the thread gage. Using a calibrated gage block—a common tool with a rich history in precision measurement—ensures that reference points remain consistent.

-
Select the Correct Thread Gage Choose a thread gage that corresponds to the thread specification of the part being tested. Refer to relevant documentation or articles to verify the correct thread pitch and size.
-
Engage the Thread Gage Take the “Go” gage and attempt to screw it onto the external threads. It should pass smoothly without excessive force. Follow this by attempting to engage the “No-Go” gage. The “No-Go” gage must not screw onto the threads—it should bind immediately, indicating the thread dimensions are within acceptable tolerance limits.

-
Verify with Additional Equipment For heightened accuracy, compare thread gage results with measurements taken using digital micrometers from GreatGages or other high-caliber tools like digital length gages. This cross-verification confirms compliance with specifications and enhances confidence in the inspection process.
Common Mistakes to Avoid When Working with Thread Gages

Thread gages are precision instruments essential for ensuring parts meet thread standards. However, incorrect usage or handling can compromise accuracy and lead to significant manufacturing or inspection errors.
1. Using the Wrong Type of Thread Gage
-
Selecting a thread gage that does not match the thread standard of the component is a frequent error. Always verify whether the part requires a go/no-go gage, taper gage, or any other specific type, and match the thread pitch and diameter specifications.
2. Neglecting Proper Calibration
-
Failing to calibrate thread gages can result in unreliable readings. Use certified calibration equipment, including gage blocks, and follow best practices, such as those outlined in calibration guides or blogs about gage setup.
3. Improper Handling and Storage
-
Thread gages are highly sensitive instruments that require careful handling. Dropping or exposing them to contaminants like dirt, oil, or moisture can cause wear or damage.
-
Store thread gages in a clean, dry environment, preferably in a dedicated case.
4. Skipping Visual Inspections
-
Ignoring routine inspections for signs of wear, burrs, or deformation leads to compromised accuracy. Before usage, always examine the thread gage visually and test its performance.
5. Applying Excessive Force
-
Thread gages are not intended to force-fit onto parts. Applying unnecessary force can damage the gage or part being tested. Instead, use steady, controlled movements to achieve proper alignment.
By recognizing and addressing these common mistakes, operators can optimize the performance of thread gages and ensure measurement accuracy.
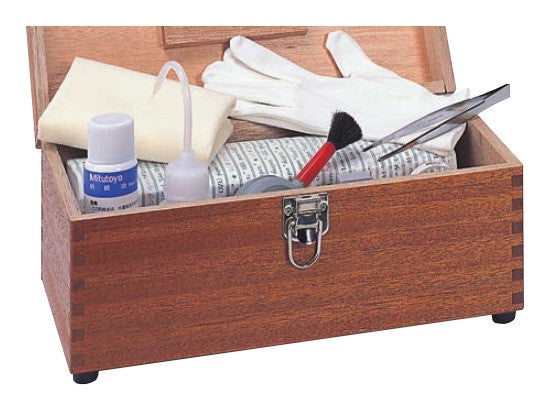
Tips for Maintaining and Storing Your Thread Gage for Longevity
Proper maintenance and storage practices are essential to ensure the longevity and performance of your thread gage. Whether working with basic inspection equipment or integrating a thread gage into advanced solutions, attention to care will maximize accuracy and lifespan. Below are practical tips to protect and extend the life of your gage.
Cleanliness is Key
-
Always clean the thread gage before and after use with a soft, lint-free cloth. This helps remove any debris, oil, or residue that could affect its accuracy.
-
For tough contaminants, use a light cleaning solvent approved for gage maintenance. Avoid harsh chemicals that can degrade the gage’s material over time.
Apply Proper Lubrication
-
Lightly oil the thread gage with a rust-preventative oil, especially if used in humid or corrosive environments. This prevents rusting, which is a primary cause of reduced lifespan in gages.
-
Wipe away any excess oil to prevent it from attracting dust or dirt during storage.
Safe Storage Practices
-
Store the thread gage in a dry, temperature-controlled environment. Excessive moisture or rapid temperature fluctuations can lead to corrosion and dimensional instability.
-
Use a dedicated storage box to ensure the gage is secured to avoid unnecessary movement or impacts.
Handle with Care
-
Handle the thread gage by its base or non-threaded sections to avoid deforming or damaging the threads. Mishandling can accelerate wear and compromise precision.
-
Avoid dropping or subjecting the gage to unnecessary force, as these tools are inherently precise and can be damaged by impacts.
By implementing these practices, professionals can maintain their thread gage’s functionality and reliability, ensuring consistent results in critical applications.
Troubleshooting Thread Gage Issues: What to Do When Threads Don't Fit

When thread gages fail to fit as expected, several factors could be causing the issue, requiring a systematic approach to troubleshooting. Thread gage accuracy is essential in precision measurement tasks, and resolving fit problems ensures reliable results.
Common Causes of Thread Gage Issues
-
Misalignment or Contamination: External contaminants, debris, or burrs on the threads can interfere with the fit. Dirt or oil residues can accumulate over time, making accurate measurements impossible.
-
Worn or Damaged Gages: Regular use may wear out the thread gage. Chips, scratches, or general wear compromise its ability to match specification tolerances.
-
Improper Calibration: Thread gages must meet standard dimensional parameters.
-
Incorrect Type or Size: Using a thread gage incompatible with the thread type or class can result in a mismatch. An incorrectly chosen gage size or pitch often leads to fitment failure.
How to Resolve Thread Fit Issues
-
Inspect the Threads: Perform a visual inspection to check for dirt, damage, or burrs. Ensure the threads are clean and free of contaminants using an appropriate cleaning method.
-
Verify Gage Condition: Examine the thread gage for visible signs of wear or damage. If wear is severe and accuracy is compromised, replacement may be necessary.
-
Ensure Proper Gage Selection: Confirm the gage matches the thread class, size, and pitch.
Careful troubleshooting and maintenance of thread gages reduce discrepancies, ensuring accuracy in critical applications. Operators should maintain proper calibration and replace worn tools as needed for dependable performance.
How to Read and Interpret Thread Gage Results Accurately

Accurately reading and interpreting thread gage results is a crucial step in ensuring part conformance during inspection processes. Reliable results depend on the proper use of precision tools and a thorough understanding of the measurements.
Steps for Accurate Thread Gage Result Interpretation
-
Understand Inspection Standards Familiarity with industry or manufacturing standards is essential before interpreting thread gage results. Standards specify tolerance limits, thread classifications, and gaging methods, ensuring measurements adhere to defined requirements for quality control.
-
Calibrate Inspection Equipment Properly calibrated tools ensures that readings are consistent and aligns them with traceable standards, minimizing measurement discrepancies.
-
Check Measurement Alignment Ensuring the thread gage aligns correctly with the part is crucial.
-
Analyze Thread Pitch and Functional Fit During measurement, focus on critical features like thread pitch diameter and functional fit.
Challenges to Avoid
Pay careful attention to tool wear or potential environmental factors that could alter readings. Always recheck measurements if inconsistencies arise. With appropriate technologies from providers like GreatGages, these challenges can be mitigated efficiently.
Frequently Asked Questions About Thread Gages for Beginners

What Is a Thread Gage and Why Is It Important?
A thread gage is a precision inspection tool used to measure and verify the dimensions, pitch, and accuracy of threaded components or fasteners. Thread gages are crucial in manufacturing, ensuring compatibility between parts and components. They offer precise standards for threaded dimensions, making them essential for a quality assurance program that would include; inspection equipment like digital micrometers or monitoring systems such as Mitutoyo MeasurLink.
What Are the Types of Thread Gages?
Thread gages typically fall into two categories:
-
Plug Gages: Used to check the internal threads of a hole or a nut.

-
Ring Gages: Designed to verify the external threads of bolts or screws.

They may also be categorized into Go/No-Go gages, which test whether the thread is within tolerance, serving as a pass/fail inspection tool.
How Should One Use a Thread Gage?
To use a thread gage effectively:
-
Ensure the thread is clean and free of debris.
-
Align the gage carefully to the thread to avoid cross-threading.
-
Use the Go side of the thread gage to confirm the thread meets standard tolerances.
-
Test with the No-Go side to ensure the thread is neither too loose nor incorrect.
This practice aligns with best methods for precision inspection.
Real-World Applications of Thread Gages in Everyday Industries
Thread gages play a critical role in ensuring precision and accuracy across a wide range of industries. Their ability to verify the pitch, depth, and diameter of threaded components makes them indispensable to fields where exact specifications are non-negotiable.
Manufacturing and Engineering
Manufacturers rely on thread gages extensively during production. For sectors such as automotive and aerospace, thread gages confirm the compatibility of fasteners, bolts, and nuts with other components.
Construction
In building infrastructure, threaded parts serve as the backbone for fastening supportive structures. Thread gages ensure that screws, bolts, and anchors meet required tolerances. Combined with inspection equipment, they help maintain the reliability and safety of building materials.
Oil and Gas Industry
The oil and gas industry depends on the accuracy of threaded connections for pipelines and equipment under extreme conditions. Thread gages, used in tandem with micrometers and calipers, guarantee that threaded components meet the exacting demands of high-pressure and corrosive environments.
Electronics and Consumer Goods
Thread gages also have a place in the electronics sector. Small, intricate threaded fasteners used in devices and tools require precise measurements.
The ability to integrate threaded measurement solutions, like those from GreatGages, into workflows greatly enhances consistency and quality assurance across industries.
Wrap-Up: Mastering the Basics of Using a Thread Gage
Properly using a thread gage is a fundamental skill in quality control and precision measurements. This tool ensures that threads conform to specified tolerances, which is critical for manufacturing, engineering, and industrial applications. To effectively employ a thread gage in conjunction with modern inspection equipment, users should follow a structured approach.
Key Steps to Build Confidence with a Thread Gage
-
Understand Thread Gage Types Familiarizing oneself with different thread gage types—such as GO/NO-GO thread gages, ring gages, and plug gages—is foundational. Each type offers specific functionality for inspecting internal or external threads. Articles that outline their differences can provide helpful insights.
-
Verify Calibration Ensure the thread gage is properly calibrated and free from damage.
-
Follow Standard Procedures Set up the thread gage according to standard operating procedures, ensuring proper alignment and consistent application of torque.
Emphasizing Consistency and Maintenance
Effective thread gage use hinges on regular checks for wear and routine maintenance. Keeping the gage clean and stored securely preserves its integrity. Reinforcing best practices with team training and the latest inspection tools ensures consistent quality across processes.
Shop & Save Now!
Upgrade your precision measurement tools today!
Need help? Our team of experts is ready to assist! Contact us today for guidance on selecting the best tools for your needs.
📩 Click here or visit our Contact Us page to send us any questions.